Sunday, December 18, 2011

Zach's Treasure Chest

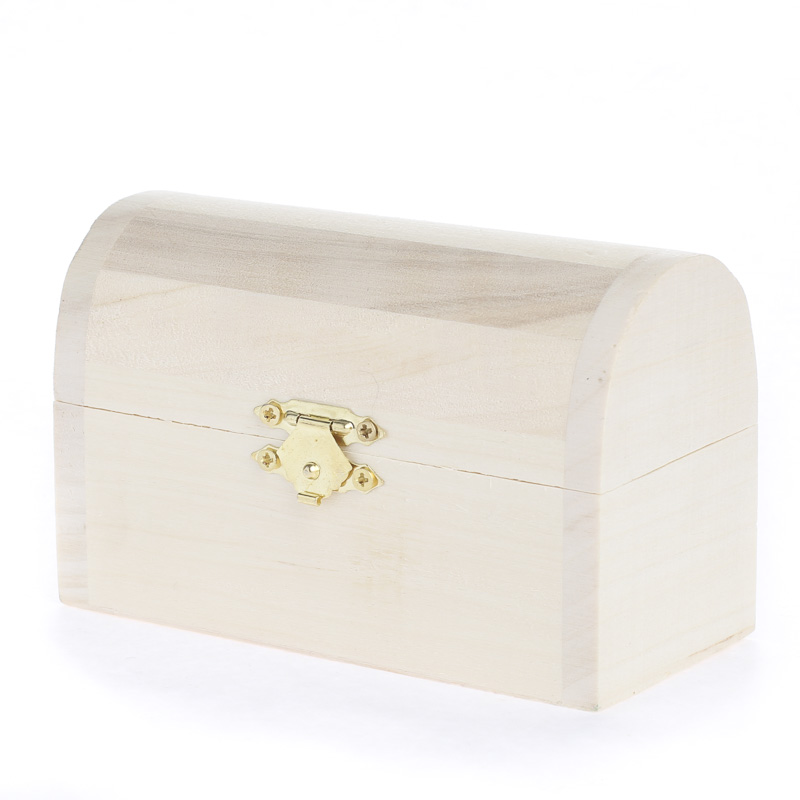
My nephew Zach is very much into pirates and likes to play-act as Captain Jack Sparrow. So one day as I was browsing in Joann and saw an unfinished chest similar to this one:

I thought, Aye a nice present ye be.

I also purchased two types of brown acrylic craft paint (Americana's Dark Chocolate and Joann's Chocolate Brown) and crackle medium. The dark chocolate coat came first, then I painted on the skull with white pain I already had. I also used white to paint "Cap'n Zach" on the top. You don't see that now, but more on that later. The last coat was the chocolate brown, which looked really red compared to the dark chocolate. It looked OK on most of the chest but the skull looked too pink.

That night I actually had trouble sleeping because I hated the look of the hand-painted Cap'n Zach so much. The next morning, I sanded it off and repainted it. I then created the Cap'n Zach we now see on paper (using GIMP and the font "Pieces of Eight") and decoupaged the letters on. I also still hated the pink tinge of the skull. I told myself to leave well enough alone, promptly ignored myself, and applied a wash of water & dark chocolate over the skull. I then Modge Podged the whole outside (except the bottom, which is unpainted).

I also couldn't figure out why there wasn't any "crackle." I hadn't used crackle before, and I suspect that the browns weren't contrasty enough.

I painted the inside lid and bottom edges in the same way (minus the crackle) and decoupaged the "Dead men tell no tales" (used GIMP and the font "Bones" to print on paper) inside the lid. While some of this was drying, I found some scrap material, cut it to size, and ironed fusible interfacing to the back. I later glued in the material using Modge Podge.

The last step was writing Zach a little message on the bottom and going to the Dollar Tree to buy cool stuff to put inside. I think I'll go back and buy a couple more bags of gold coins before I wrap it up!


Saturday, December 17, 2011

Paper doll Christmas present

I have been wanting to try my hand at making paper dolls for some time, and so decided that would be my niece (really cousin once removed, but who's counting) would get for Christmas this year. I later found out that she wanted some anyway, so peachy keen!

I'm not great at drawing by hand, so I opted to use the use the program with the unfortunate name GIMP, which stands for GNU Image Manipulation Program. It's free, open source, and terrific. Next, I needed a body. 'Cause I can't draw one. I searched Google Images for "Paper Doll" and "Paper Doll Template," finally settling on Betsy, from McCall.

What I found quite difficult to do was graft my niece's head to Betsy's body. The colors were never quite right; I couldn't get the head size to look normal, and I couldn't get the Zoey head to look cartoony-enough to match Betsy. Ultimately, I opted to cartoonify fully Zoey's head using directions found after a Google search (of course I can't find the URL now). Basically, you place an image in GIMP and use the tools to re-draw the image. I did the same for Betsy's body, then merged the head and body together like this:

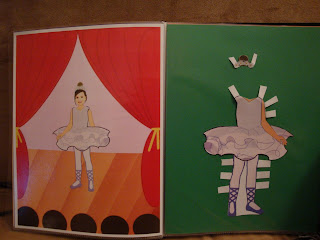
I used GIMP to create all of Zoey's clothes, always keeping the doll Zoey on screen as a template so that arms and legs would match. In all, I created two princess dresses (blue and yellow), Daphne (from Scooby Doo doncha know), a Scottish girl, a ballerina, a mermaid, and fairy.

The doll is printed on glossy laser printer paper and adhered with Modge Podge to chipboard, which was cut to size (EXACTO knife and scissors). The clothes were all printed on the same glossy paper.

When all was said and done, I thought, how am I going to give this to her, in a Ziploc bag? I didn't feel like making a box, particularly as at the time I was finishing her brother's pirate chest (stay tuned for that). I decided to put everything in a "book." I created a little map called "Zoey's World" that featured places Zoey the Doll may wish to visit using the particular outfits I made. I included a castle (natch), horse stables and pasture, a village (that would include libraries, museums, theaters, shops), an animal sanctuary, a haunted house, an amusement part, a magic pool, and a pirate cove. Zoey & I recently spent time in an amusement park, and I thought the pirate cove may encourage Zoey and her brother to make-believe together.

In the book, each outfit has its own two-page spread: the verso depicts the Zoey Doll in the outfit somewhere in Zoey's World; the recto holds the outfit itself.

I'm pretty happy with the way it turned out, though I wish that I had been able to make more outfits. Also, I learned so much more about GIMP as I worked and, as I said, have really come to enjoy that program.

So, below is the book I made for Zoey. I wanted to put the images in as a slideshow, but now that Picasa is Google Plus images, I can't seem to figure out how to do that. (??)


Monday, June 27, 2011

Buttercup Bag

My third craft since beginning this blog (the second will be coming out of order b/c it's a birthday present and I don't want her to see it here first) is a Buttercup Bag. This is a free pattern for personal use from the blog "Made By Rae." I used her Buttercup Bag remix version, which is basically more interfacing and 129% bigger than the original.

Since I didn't take any pictures as I went along, here's the finished product first! The outer purse material is a sweet little floral. I couldn't quite figure out which kind of pleats the instructions were trying to get me to do, so I chose to do box pleats. I think they turned out terrific! It did make the lining a bit too long for the outer material, once I connected the two towards the end. But, I just folded over the lining inside a bit and no problems at all.

Here's a bit of detail on the pleating, and also a showcase of the buttons! The buttons were covered in the same material using a cheap-o button cover from Joann's. The original pattern instructions call for an rounded rectangle for the decorative fabric behind the buttons. I tried twice and both times they looked extremely deformed so I settled on a smaller version of the pattern top. I like it!

Here you can also see details of the buttons and pleats as well as the ties I added. These are made from the lining fabric. After I made the purse strap as instructed, I added a strip of the red and white checked lining fabric at each end of the strap, perpendicular to the strap (like a T). Once the strap was sewn into the lining of each side of the purse, I could pull the strip of checked material out and tie a little decorative knot. The added checked material has an added bonus: it camouflages where the straps are sewn into the lining AND where I mismatched the seams on the sides of the purse. Plus they are too cute!


Last but not least, the inside of the purse.The directions call for a magnetic snap on each side of the purse, which I did. It also calls for one pocket, but I added two, one on each side of the purse.

This purse was fairly easy to make, especially considering that I am a novice seamstress. Much of it was sewn on the machine, though I did sew the decorative items on by hand as well as the slip stitch to close the bottom once everything was turned the right way out. It took me about fifteen hours, which is a far cry from a commenter on the Made By Rae website who says she made it in two hours! Oh well. I had fun.

The real test will be: is it functional? I'm going to start using it today, so we'll see.

One other thing... the night I finished up the purse, I watched several episodes of the old Kolchak: The Night Stalker show. I guess I'll probably always hear that whistle in my mind when I look at my purse.

Sunday, May 29, 2011

First craft in a long time-- the Angel wall hanging

I should be doing other work right now so I am going to be super brief here!

This was made (belatedly) for my stepmom who is crazy about angels.
  1. The frame and matte came from Michael's clearance bin. I dismantled it.
  2. Then I printed the angel sheet music from The Graphics Fairy website (love love love that website) onto beigy cardstock. 
  3. Took a while to decide how to place on matte. Once decided, used cutting board with deckle edge blade.
  4. Used Modge Podge to adhere sheet music to the matte.
  5. Matte looked too loud and busy so Modge Podged white tissue paper on top.
  6. Printed out angel (also from The Graphics Fairy) onto white card stock and cut out. Used that puffy tape to adhere to burgundy card stock. 
  7. Taped card stock to matting, then used a sewing pin to make hole to dig small brads through for a more rustic look. Did same with paper flower (also a Michael's clearance item).
  8. Stamped word "blessings" onto beigy card stock with brown ink, making sure to get the edges of the stamp as well as the letter. Cut each letter out, glued to burgundy card stick cut with deckle edge.
  9. Used puffy tape to place on matte.
  10. Stapled a dark green ribbon (not shown, oops) to hard backing of frame. (Used big industrial stapler!)
  11. Reassembled frame. Took about 3 hours including drying time.