Showing posts with label ModgePodge. Show all posts

Tuesday, October 9, 2012

Drac's coffin

So this little project started out as one of those raw, balsa (?) wood coffins from Michael's (the kids' Halloween crafting kiosk).

I first painted the whole thing black using ordinary craft paint. Once dry, I used newspaper to create templates for the decoupage by wrapping the newspaper over the different sections, then cutting out where the newspaper was bent. I have three coffins to decorate, so you'd think I'd save these templates, wouldn't you? You'd be wrong. Oops, I forgot and threw them away with the scraps. Oh, well.

So I had some Recollections Halloween paper (I think from 2011? Not sure) and cut various "planks" of the coffin to size, placed them on the coffin, and marked where the paper should be split (so the coffin can open, of course). I sliced the paper using an Xacto blade, then used matte Modge Podge to adhere & seal. Using K & Company's Brenda Walton Haunted House ChipBox, I placed a ghost chip on on of the side/top planks, marked with my thumbnail where he should be split, then cut him and decoupaged him on in two pieces. When the coffin is closed, he's whole. When it's open, EEEEEK!

I then decoupaged the "Danger" chip (with purple cardstock underneath, corners cut by hand to match chip's corners). The chip bat came next, attached via black cardstock folded like an accordion. And yes I did just have to spell check accordion. I'm torqued that the bat is a little top heavy, but with a little manipulation he floats there pretty well.


Last came Drac. The chip that came in the box was too wide for the coffin, so I scanned him in and manipulated him, moving the arm, the feet, and shaved off some of the cape using the Open Source image manipulate, GIMP. My printer didn't spit him out as vivid as I'd like, and since the original had glitter, I used black and red glitter to jazz up his cape a bit, plus used colored pencils to blacken his hair and shoes, and put fresh blood on his lips. Mmmmmm. I had wanted him to spring out of the coffin as it's opened, but the springing was a bit lame and no one wants a lame Dracula! So I left him free, and, anyway, perhaps my nephew William (for whom this Halloween treat was created) will want to use him to turn his Lego men into the undead.


Fangs for stopping by.


Sunday, February 26, 2012

Storage box re-cover

This time my craft project grew out of necessity-- a place in the living room to put crossword puzzle stuff, instead of just laying there in a heaping mess.

I started out with what I think might be the UGLIEST photo/VCR box I've ever seen. I don't think I bought it, unless I thought I might cover it someday.

Extremely ugly storage box
The living room is brown & blue with other accents, mostly green. I decided to use some of my scrapbook paper to cover the box, which turned out to be kind of a lousy idea, because the paper was really too thick and created problems later on. However, the paper itself is very pretty. It came from this pad, Die Cuts' "The Mademoiselle stack":


Coincidentally, a few days ago the French government did away with "Mademoiselle" in official documents. But I digress.

The papers from the pad I used were an aqua floral on beige with green polka dots and a dark blue with Marie Antoinette:


I measured the sides and bottoms of the box, and on the backs of the papers (two each) I used a ruler and laid out the pattern. The dark blue, intended for the inside, ran a little short, so on one side I had to piece meal the papers. When gluing, I used modge podge and used clothes pins as clamps:


One of the most short-sighted things I did was not cut the papers longer than the sides, so that the corners and lip could be properly covered. I ended up having to cut extra paper in the floral to place around the lip. I cut the paper strips with a scalloped edge so that it would look more like a pseudo-ruffle and on purpose. I used some K&Company punch-out strips to cover the corners and (hopefully) hold the papers together and hide the "crack."


The final result looks okay-- not the greatest when you look up close, but still WAY better than the original!


Sunday, December 18, 2011

Zach's Treasure Chest

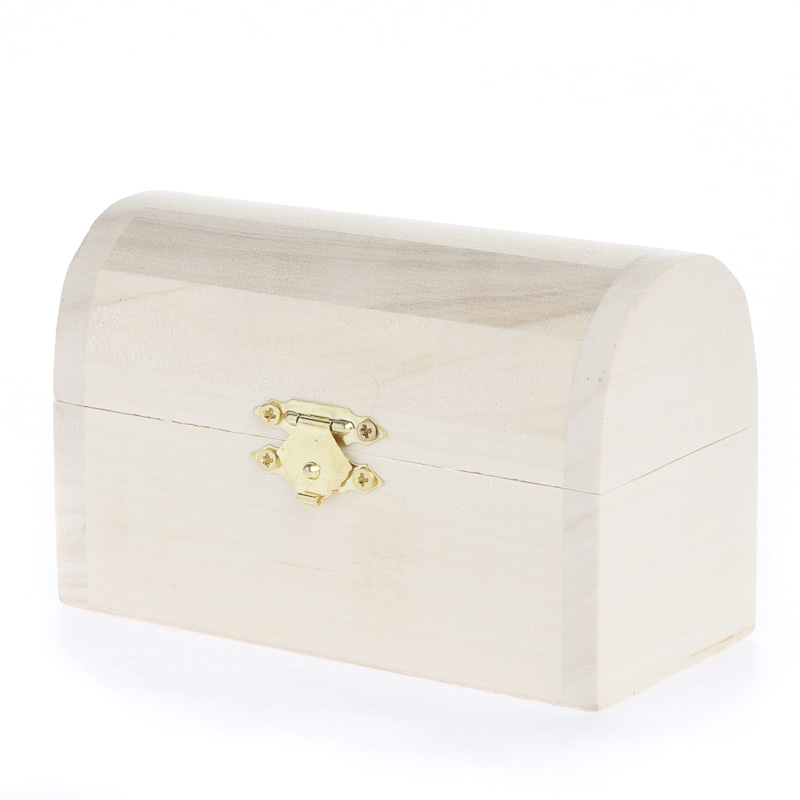
My nephew Zach is very much into pirates and likes to play-act as Captain Jack Sparrow. So one day as I was browsing in Joann and saw an unfinished chest similar to this one:

I thought, Aye a nice present ye be.

I also purchased two types of brown acrylic craft paint (Americana's Dark Chocolate and Joann's Chocolate Brown) and crackle medium. The dark chocolate coat came first, then I painted on the skull with white pain I already had. I also used white to paint "Cap'n Zach" on the top. You don't see that now, but more on that later. The last coat was the chocolate brown, which looked really red compared to the dark chocolate. It looked OK on most of the chest but the skull looked too pink.

That night I actually had trouble sleeping because I hated the look of the hand-painted Cap'n Zach so much. The next morning, I sanded it off and repainted it. I then created the Cap'n Zach we now see on paper (using GIMP and the font "Pieces of Eight") and decoupaged the letters on. I also still hated the pink tinge of the skull. I told myself to leave well enough alone, promptly ignored myself, and applied a wash of water & dark chocolate over the skull. I then Modge Podged the whole outside (except the bottom, which is unpainted).

I also couldn't figure out why there wasn't any "crackle." I hadn't used crackle before, and I suspect that the browns weren't contrasty enough.

I painted the inside lid and bottom edges in the same way (minus the crackle) and decoupaged the "Dead men tell no tales" (used GIMP and the font "Bones" to print on paper) inside the lid. While some of this was drying, I found some scrap material, cut it to size, and ironed fusible interfacing to the back. I later glued in the material using Modge Podge.

The last step was writing Zach a little message on the bottom and going to the Dollar Tree to buy cool stuff to put inside. I think I'll go back and buy a couple more bags of gold coins before I wrap it up!


Saturday, December 17, 2011

Paper doll Christmas present

I have been wanting to try my hand at making paper dolls for some time, and so decided that would be my niece (really cousin once removed, but who's counting) would get for Christmas this year. I later found out that she wanted some anyway, so peachy keen!

I'm not great at drawing by hand, so I opted to use the use the program with the unfortunate name GIMP, which stands for GNU Image Manipulation Program. It's free, open source, and terrific. Next, I needed a body. 'Cause I can't draw one. I searched Google Images for "Paper Doll" and "Paper Doll Template," finally settling on Betsy, from McCall.

What I found quite difficult to do was graft my niece's head to Betsy's body. The colors were never quite right; I couldn't get the head size to look normal, and I couldn't get the Zoey head to look cartoony-enough to match Betsy. Ultimately, I opted to cartoonify fully Zoey's head using directions found after a Google search (of course I can't find the URL now). Basically, you place an image in GIMP and use the tools to re-draw the image. I did the same for Betsy's body, then merged the head and body together like this:

I used GIMP to create all of Zoey's clothes, always keeping the doll Zoey on screen as a template so that arms and legs would match. In all, I created two princess dresses (blue and yellow), Daphne (from Scooby Doo doncha know), a Scottish girl, a ballerina, a mermaid, and fairy.

The doll is printed on glossy laser printer paper and adhered with Modge Podge to chipboard, which was cut to size (EXACTO knife and scissors). The clothes were all printed on the same glossy paper.

When all was said and done, I thought, how am I going to give this to her, in a Ziploc bag? I didn't feel like making a box, particularly as at the time I was finishing her brother's pirate chest (stay tuned for that). I decided to put everything in a "book." I created a little map called "Zoey's World" that featured places Zoey the Doll may wish to visit using the particular outfits I made. I included a castle (natch), horse stables and pasture, a village (that would include libraries, museums, theaters, shops), an animal sanctuary, a haunted house, an amusement part, a magic pool, and a pirate cove. Zoey & I recently spent time in an amusement park, and I thought the pirate cove may encourage Zoey and her brother to make-believe together.

In the book, each outfit has its own two-page spread: the verso depicts the Zoey Doll in the outfit somewhere in Zoey's World; the recto holds the outfit itself.

I'm pretty happy with the way it turned out, though I wish that I had been able to make more outfits. Also, I learned so much more about GIMP as I worked and, as I said, have really come to enjoy that program.

So, below is the book I made for Zoey. I wanted to put the images in as a slideshow, but now that Picasa is Google Plus images, I can't seem to figure out how to do that. (??)